Recipe

5 Ways To Roast Bell Peppers

Source : instagram

Colorful peppers, in any form, brighten our plates and our meals. But roasted ones are the real treat. Whatever their color, they provide a different level of deliciousness - tender, sweet, and perfectly charred.

Though jarred peppers are quick and easy, they can’t rival the smoky, sweet flavor of freshly home-roasted peppers, free from excess salt and brine. Plus, depending on your mood and occasion, they can be roasted in various ways. Let’s explore them here!

1. Oven Method

Home cooks enjoy this approach for its simplicity and reliability, delivering deliciously charred peppers with minimal work. You’re left with sweet, soft peppers that provide a rich depth of flavor to any dish.

From novice to professional chefs, all will enjoy the magic of oven roasting, the technique that turns peppers into that versatile component for recipes.

Instructions

  1. Using a sharp knife, cut the peppers in half from top to bottom, being very careful. Then carefully remove the stem, seeds, and inside white membranes. Take your time cleaning them very well, making sure no seeds remain.
  2. Line a baking sheet with parchment paper or aluminum foil to make cleanup way easier. This doesn't allow food to stick, and cleaning is easy. Arrange the pepper halves cut-side down on the sheet. The cut side facing down allows for even roasting and helps develop a beautiful char.
  3. Lightly brush with olive oil with either a pastry brush or your hands until they are thinly coated. The oil helps conduct heat and promotes beautiful caramelization.
  4. Get your oven heated to 450°F. That ideal char and caramelization requires this excessive temperature. Put baking sheet in the center rack of the oven.
  5. Roast the peppers for approximately 20-25 minutes. Keep an eye on them after the 15-minute mark. You're looking for the skin to become slightly blistered and dark, with deep brown or black spots.
  6. Once roasted, pull off the baking sheet from the oven. Immediately transfer the peppers into a bowl and seal it with a plastic wrap or a very fitting lid. Let them steam within for 10-15 minutes before peeling.
  7. You can slice them into strips, chop them, or keep them halved, depending on your recipe.

Source : instagram

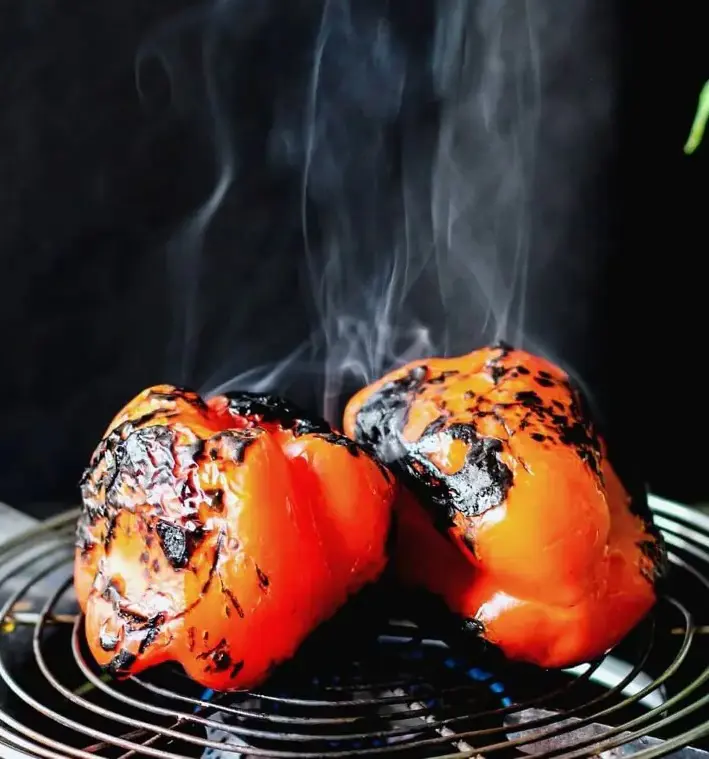
2. Stovetop Method

Roasting on the stovetop is faster and even more flexible. That is pretty useful if someone wants to make peppers without heating up the whole kitchen or when someone only needs a few for your favorite bell pepper recipes.

There are two primary approaches to this technique: directly over a gas flame or using a grill pan or cast-iron skillet. Both methods deliver deliciously charred peppers with minimal equipment and effort.

Directly Over a Gas Flame

The direct flame method is a traditional technique that provides an intense, smoky flavor. It’s perfect for anyone with a gas stove who craves that classic, slightly charred finish on their peppers.

Instructions

  1. With long tongs, hold the entire bell pepper just above the gas flame. If not using tongs one can use a long metal fork, though tongs allow more control and are a little safer.
  2. Slowly rotate the pepper, allowing each side to be exposed to the flame. You'll want to move it continuously to ensure even charring. The goal is to create a consistently blackened, blistered skin while avoiding burning the pepper underneath.
  3. Watch the pepper closely. The skin will start to bubble and turn black in patches. This process usually takes about 5-7 minutes depending both on the size of the pepper and the strength of your flame.
  4. Continue rotating until the entire surface of the pepper is evenly charred. The pepper should look almost completely black on the outside, with a soft, slightly collapsed appearance.
  5. Once done, immediately transfer the charred pepper into a bowl and seal in, using either plastic wrap or a lid.

Source : instagram

On a Grill Pan (Or Cast Iron Skillet)

This method provides a more controlled roasting environment, allowing for both whole and halved pepper roasting. If a gas stove isn’t available or you prefer more control over the roasting, this method is ideal.

Instructions

  1. Set the stovetop on medium-high, then heat the grill pan. Remember you want hot but not smoking.
  2. Place whole peppers directly on the hot surface. If using a grill pan, position them so they sit between the raised grill lines.
  3. Allow the peppers to sit undisturbed for 3-4 minutes. This lets the bottom develop a good char. Then, with tongs, rotate the pepper to char each side evenly.
  4. For halved peppers, lightly brush cut-side with olive oil to prevent them from sticking. Place them skin-side down in the hot pan. This method helps blister the skin while keeping the flesh tender.
  5. Cook for 4-5 minutes without moving. The skin will start to blacken and blister. If the skin isn't charring, slightly increase the heat. If needed, flip the peppers to char the cut side lightly, about 1-2 minutes.
  6. This is for both methods: After roasting, follow the steaming and peeling process described in the oven-roasting method.

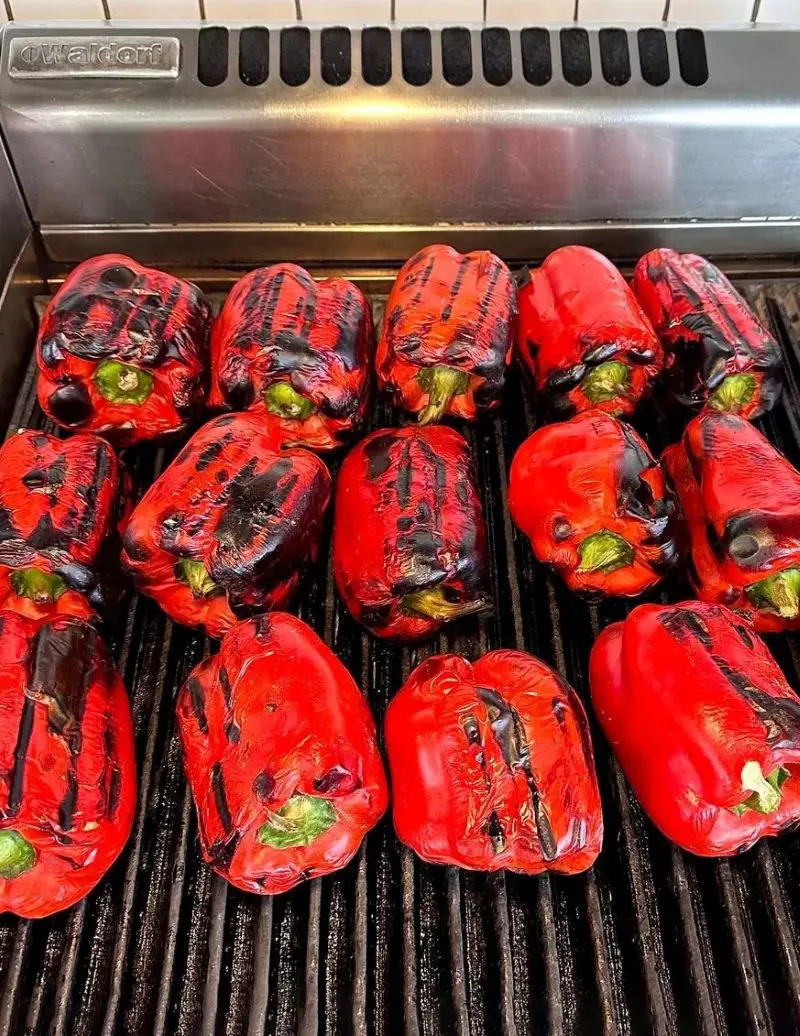
3. Grill Method

This outdoor cooking technique is pretty famous during summer season barbecues and backyard gatherings. Grilling transforms peppers, creating a stunning char that caramelizes their natural sweetness and intensifies their taste.

Perfect for outdoor cooking lovers, this approach supplies beautifully roasted peppers with minimum effort and most flavor, making it a go-to approach for home chefs and grill masters alike.

Instructions

  1. Turn the appliance to medium heat - on a gas grill, this is around 400-450°F. And for charcoal, wait for the coals to turn white and create the heat you desire. Next, clean the grates really well.
  2. Grab a pastry brush and lightly coat each pepper with olive oil. This isn't about drowning the peppers, just a thin, even layer that helps create a beautiful char and prevents sticking. There's no need to cut or slice them - we're going whole today.
  3. Carefully place the whole peppers directly on the grill grates. Position them at a slight angle to create those attractive crosshatch marks. Spread them out so each pepper has breathing room.
  4. Close the grill lid. Leave the peppers undisturbed for about 5-6 minutes. During this time, the skin will start to blister and char.
  5. Open the grill and use long tongs to turn the peppers. You're looking for an even, blistered char on all sides. Rotate them a quarter turn, ensuring each side gets its moment of direct heat. Close the lid and continue grilling.
  6. They're ready when the entire surface is covered in black blisters and the pepper looks slightly deflated. This usually takes about 15-20 minutes total, depending on your grill and pepper size. The skin should look almost completely blackened, but don't worry - this is exactly what we want.

Source : instagram

4. Air Fryer Method

Air fryer roasting is best for quick food, busy weeknights, and small kitchens where traditional roasting approaches might feel bulky.

The appliance supplies uniformly charred peppers, creating a crispy exterior with tender inside. It's faster than oven roasting, uses less energy, and produces consistently delicious results with barely any oil or cleanup required.

Instructions

  1. Halve each pepper and clean it well, removing all the unnecessary inner bits.
  2. Lightly drizzle olive oil over the pepper halves, then use your fingers or a pastry brush to spread it evenly. The oil helps conduct heat and promotes beautiful caramelization. Upload a dash of salt and freshly ground black pepper.
  3. Preheat your air fryer to 400°F (200°C). This excessive temperature is vital for developing the best char and caramelization. If your air fryer has a preheat setting use it. Otherwise, run it empty for 2-3 minutes or so to see how hot or warm it is.
  4. Place the peppers, cut in half with the skins facing down, in the air fryer basket, allowing a little space between. You may have to make these in batches if your air fryer is small.
  5. Once the air fryer is ready, carefully place the basket inside. Set the timer for 8-10 minutes. The exact time relies upon your air fryer model and the size of your peppers. Avoid opening the basket too frequently, as this releases heat and disrupts the cooking process.
  6. Around the 5-minute mark, pause the air fryer and open the basket. Use tongs to give the peppers a gentle turn. This ensures even charring on all sides. If some peppers are cooking faster than others, you can rearrange them slightly.
  7. Continue to cook for another 3-5 minutes, until well-charred and blistered in the skin. The peppers should look slightly collapsed and have beautiful dark spots. The skin will be bubbly and almost completely blackened.
  8. If you prefer a more intense char, you can add an extra minute or two, but watch carefully to prevent burning.

Source : instagram

5. Wood Fire Method

Wood-fired oven roasting represents an age-old culinary approach that transforms these vibrant vegetables into smoky deeply caramelized delicacies.

Popular in Mediterranean and rustic cuisines, this technique creates peppers with an intense, smoky character that can't be replicated through traditional cooking strategies.

Perfect for outdoor cooking fans, pizza restaurants, and home chefs in search of genuine, sturdy flavors.

Instructions

  1. Fire up your wood-fired oven well in advance. You'll want to build a robust fire using hardwoods like oak or fruitwood. Let the wood burn until you get a good strong fire, with lots of glowing embers.
  2. Shoot for 450-500°F - use an infrared thermometer to check the oven temperature. The walls should be radiating even heat that shall provide ideal roasting.
  3. Position the pepper upright in a cast-iron skillet or a heavy-duty metal tray. Place the tray near the hot embers, but not directly in the flame. The goal is to expose the peppers to intense, radiant heat without direct fire contact.
  4. Watch the peppers closely as they will blacken quickly. Within 3-4 minutes, you'll notice the skin starting to blister and char. The intense heat will create beautiful, uneven blackened spots across the pepper's surface.
  5. As soon as the top of the peppers develops a deep char, carefully rotate the pan. Use long-handled tongs to move the peppers, ensuring even exposure to the heat.
  6. Continue rotating the peppers, allowing each side to develop that signature charred appearance. This process typically takes 10-15 minutes total.
  7. Look for a completely blackened exterior with a soft, collapsed appearance. The peppers should look almost entirely black. This indicates they've reached the perfect roasting point.
  8. When all sides of the peppers are perfectly roasted, take them out of the oven.

Source : instagram

How To Peel Roasted Peppers

Peeling roasted peppers is an easy process. The key is creating the perfect steaming environment that helps separate the tough, blackened skin from the sweet pepper flesh.

Immediately after roasting, transfer your hot peppers to a heat-safe bowl and cover them tightly with plastic wrap (or snug-fitting lid). This traps the steam inside, which works like magic to loosen the charred skin.

Let peppers sit for 10-15 minutes - they'll have cooled down enough to be managed at that point. In that time, steam is working on your behalf, loosening the attachment between skin and pepper.

When you're ready, uncover the bowl and gently pull at the skin. It should slip off almost effortlessly, revealing the soft, smoky pepper beneath.

Source : instagram

If the peppers were roasted whole, make a small cut or puncture to release any trapped liquid. For peppers that were halved, simply pull open and scoop out the seeds with a spoon or fingers.

Don't worry if you do not catch every single seed absolutely; a few stragglers will do no harm. Discard the seeds and charred skin, and you'll be left with perfectly prepared, silky-smooth roasted peppers ready for your favorite recipes.

Tips For The Best Roasted Bell Peppers

  • Choose the Right Peppers: Choose firm, heavy bell peppers with smooth, unblemished skin. Thicker walls are ideal for roasting and hold their shape well. Skip peppers with blemishes like softness, wrinkles, or faded color.
  • Clean Thoroughly: Gently rinse the peppers under cold water with care. Then with your fingers gently remove any dust or debris you can find. Pat them absolutely dry with a clean kitchen towel. Moisture can interfere with roasting, so make sure they are absolutely dry before you begin.
  • Temperature is Key: Regardless of your cooking method adjust the heat properly. Medium-high to high heat delivers the best roasting results. You need quick, intense heat that chars the outside while keeping the inside tender. If the heat is simply too low, you'll end up steaming in place of roasting.
  • Don't Rush the Char: Let the peppers develop a deep, even char. Those black blisters aren't a mistake - they're flavor. Turn the peppers regularly to ensure all sides get that smoky, caramelized exterior. Perfect roasting requires steady patience.
  • Experiment with Methods: Try different roasting methods - oven, grill, stovetop, or even wood fire. Each method brings a unique flavor. Don't be afraid to experiment and find your favorite technique.
  • Seasoning Timing: Add salt and herbs after roasting, not before. Salt can draw out moisture and prevent proper charring. Herbs can burn at high temperatures. Season after roasting for the best flavor and texture.

Ways To Use Roasted Peppers

Source : instagram

  • Antipasto Platters: Picture a beautiful Mediterranean-style spread - roasted peppers are the star attraction. Arrange them alongside olives, cured meats, and soft cheeses. Summer get-togethers and wine evenings are ideal for serving these delights.
  • Sandwich and Wrap: Roasted peppers bring a gourmet touch to everything from classic club sandwiches to vegetarian wraps. Their gentle texture and deep flavor cut through rich elements, adding complexity and brightness.
  • Salad Superstar: Slice up roasted peppers and see them take your salad from basic to brilliant. They pair perfectly with crisp greens, adding a smoky sweetness that complements fresh greens. Toss them in Mediterranean salads, grain bowls, or mixed green salads.
  • Pizza and Flatbread Topping: Scatter them across homemade or store-bought pizzas for an instant flavor upgrade. They're particularly magical on white pizzas, adding a sweet, charred dimension that balances creamy cheeses.
  • Pasta Companion: Chop roasted peppers and mix them into pasta dishes for an instant flavor boost. They're incredible in creamy white sauces, adding a smoky sweetness that cuts through richness. Mediterranean and Italian-inspired pasta dishes absolutely sing with roasted peppers.
  • Dip and Spread Base: Blend roasted peppers into hummus, muhammara, or different Mediterranean dips for an incredible flavor transformation. Great for events, game nights, or quick snacks.
  • Meat and Fish Accompaniment: Serve roasted peppers alongside grilled meats or fish as a great side dish. Their sweet, smoky flavor enhances protein beautifully. They're particularly magical with grilled chicken, fish, and lamb.

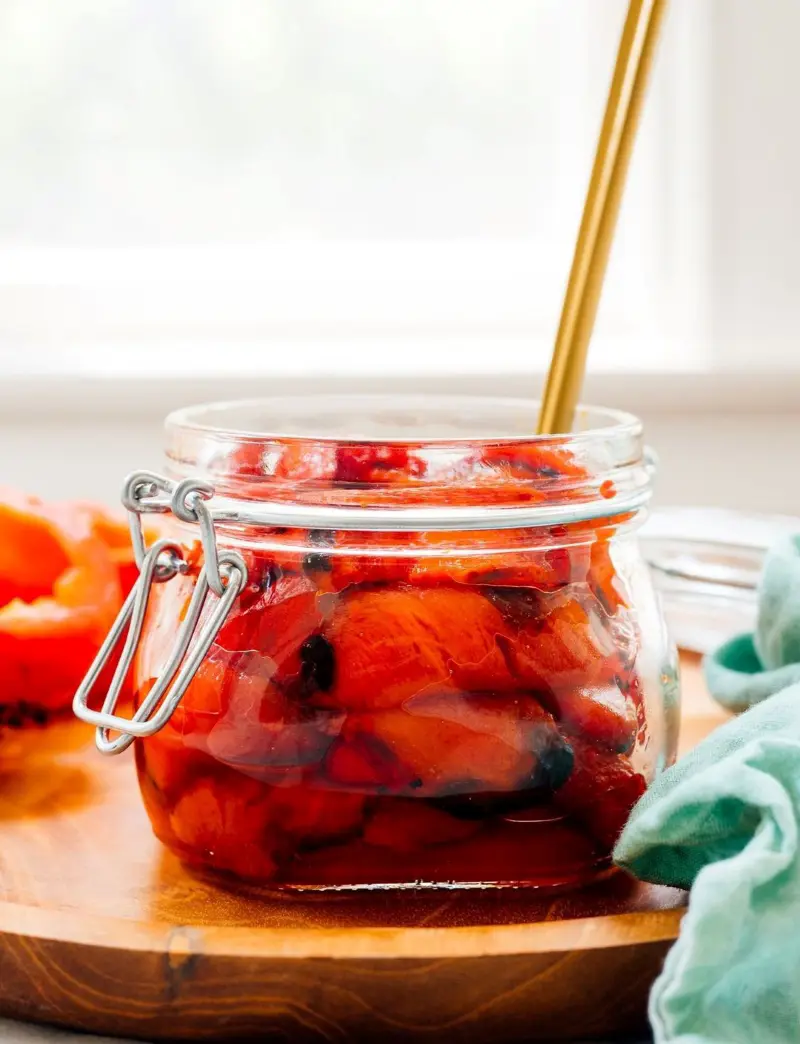
How To Store Roasted Bell Peppers

Refrigerator Storage

Want to keep those delicious roasted peppers fresh for a quick week or two? Here's your game plan. Transfer the peppers to a clean glass jar or tightly sealed container.

Pour enough olive oil to completely cover the peppers - this helps keep their taste and prevents them from drying out. The oil acts like a protective barrier, keeping your peppers tender and scrumptious.

Seal the container tight and pop it in the fridge. These peppers will stay fresh and ready to use for 1-2 weeks.

Source : instagram

When you are geared up to enjoy them, simply pull out the amount you want. Just use a clean fork to remove the peppers, ensuring you don't introduce any bacteria into the jar.

Freezer Storage

Start by using reducing the peppers into your selected size - strips, chunks, or halves. Spread them out into one layer over a parchment paper-lined baking sheet. This prevents the peppers from sticking together.

Freeze the sheet for about two hours until the peppers are solid. Afterward, transfer them to a freezer-safe container or zip-top bag for storage, where they will keep for up to three months.

To use them, you have two thawing options available. For quick use, microwave them for a few seconds. If you're planning ahead, transfer the peppers to the refrigerator the night before and let them slowly defrost.

Pro Tip: Always use clean utensils when handling stored peppers to keep them fresh longer!